
Interior Fit-Out
The construction of Trim’s entirely new interior
The largest scale job in the restoration of the sailing yacht ‘Trim’ was to completely rebuild the interior. I stripped 70% of the hull to bare fibreglass before rebuilding from the hull up. The remaining 30% was extensively refurbished. The layout was re-designed to comfortably accommodate 4 guests and 2 crew with two seperate heads, oversized galley, comfortable saloon, workshop and a dedicated navigation desk. This lengthy process can be broken down into chronological stages:
1. Demolition - remove and dispose of all rotted wood, compromised bulkheads, all wiring, chainplate knees, plumbing.
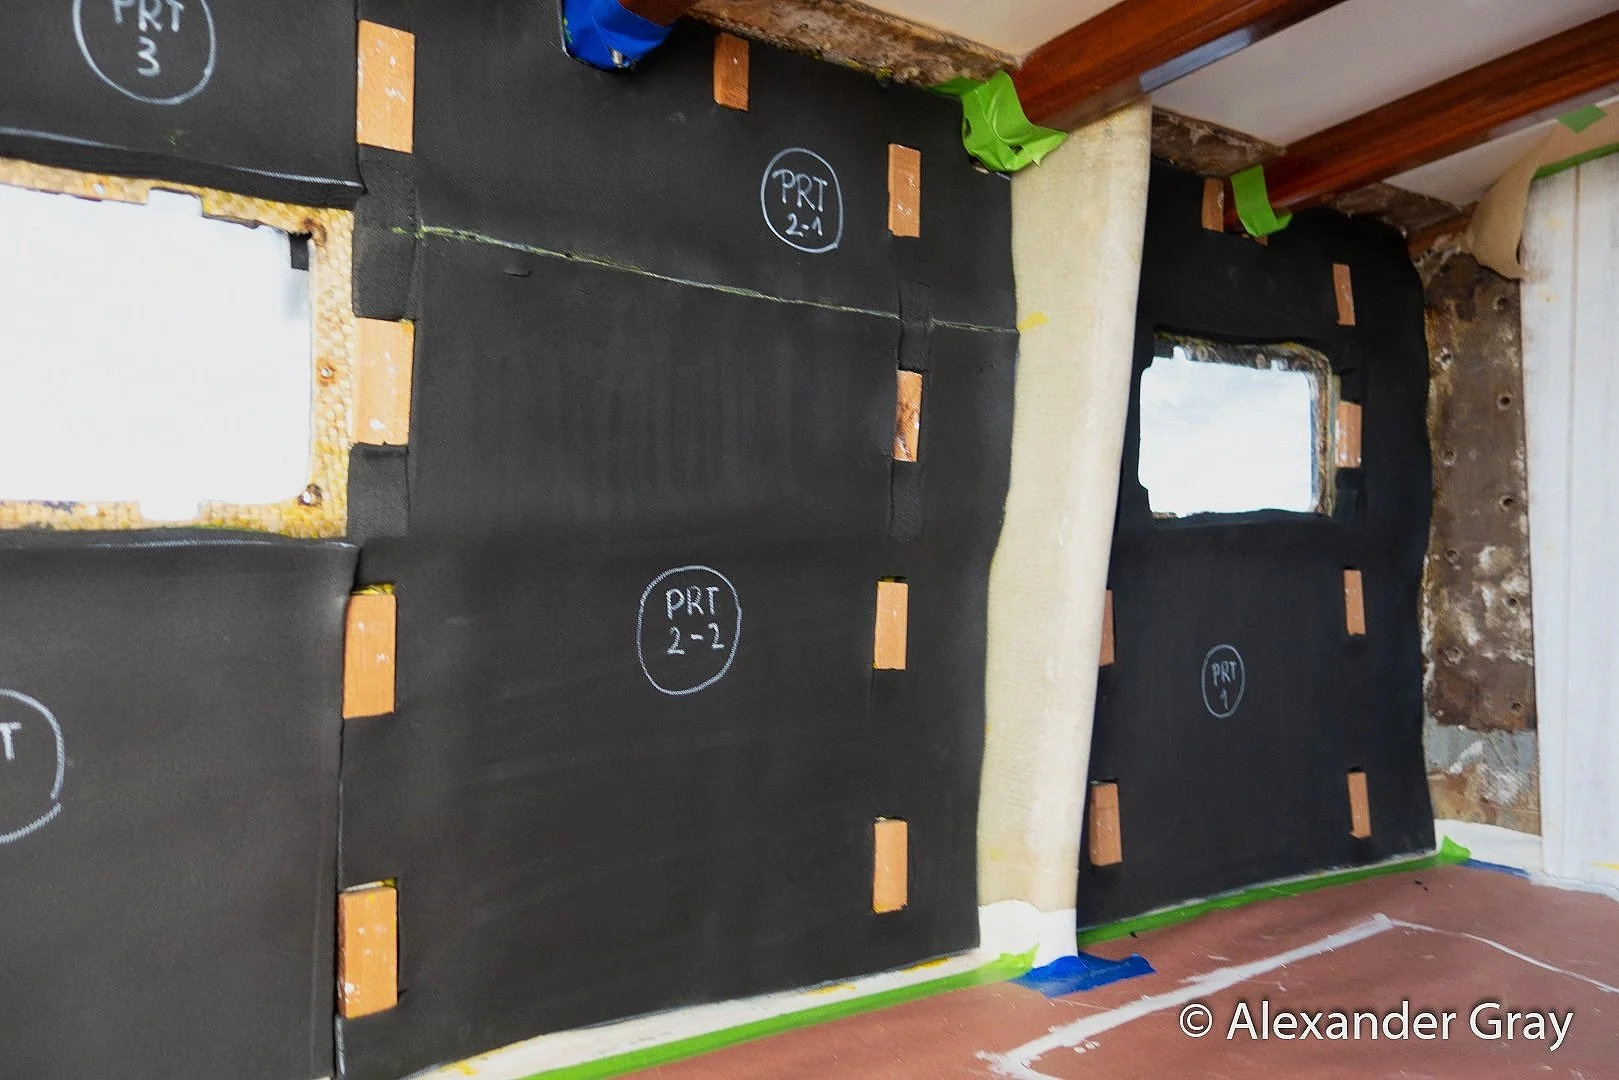
2. Prepare surfaces - All areas of the hull that were to be bonded with fibreglass were prepared by grinding with 24-40 grit abrasive discs. This included tabbing areas for new bulkheads, bonding surface areas for new chainplate knees, tabbing for interior cabinetry and bunks. The remainder of the hull was cleaned with solvent, in preparation for insulation to the waterline and paint from the waterline down.
3. Bulkheads - Several rotten bulkheads were replaced with ¾” Douglas Fir marine grade plywood. Each bulkhead was carefully dry fitted before being permanently bonded to the hull with thickened epoxy to avoid creating concentrated pressure points or ‘hard spots’. An epoxy filet and fibreglass tabbing was then applied along the bulkhead to the hull joint to provide proper load dispersion.
4. Insulation - I chose to use flexible, closed-cell elastomeric sheet insulation which provides excellent resistance to the transfer of thermal heat, vibrations, and noise. Cutting the insulation accurately to size was made easy by first creating templates from thin strips of plywood and hot glue. In parts of the hull that will be exposed to living areas, such as the V berth, strips of wood were permanently bonded to the hull to provide a base to fasten the timber hull lining to. Fast drying neoprene contact adhesive was then applied to both bonding surfaces and the insulation fitted permanently in place.
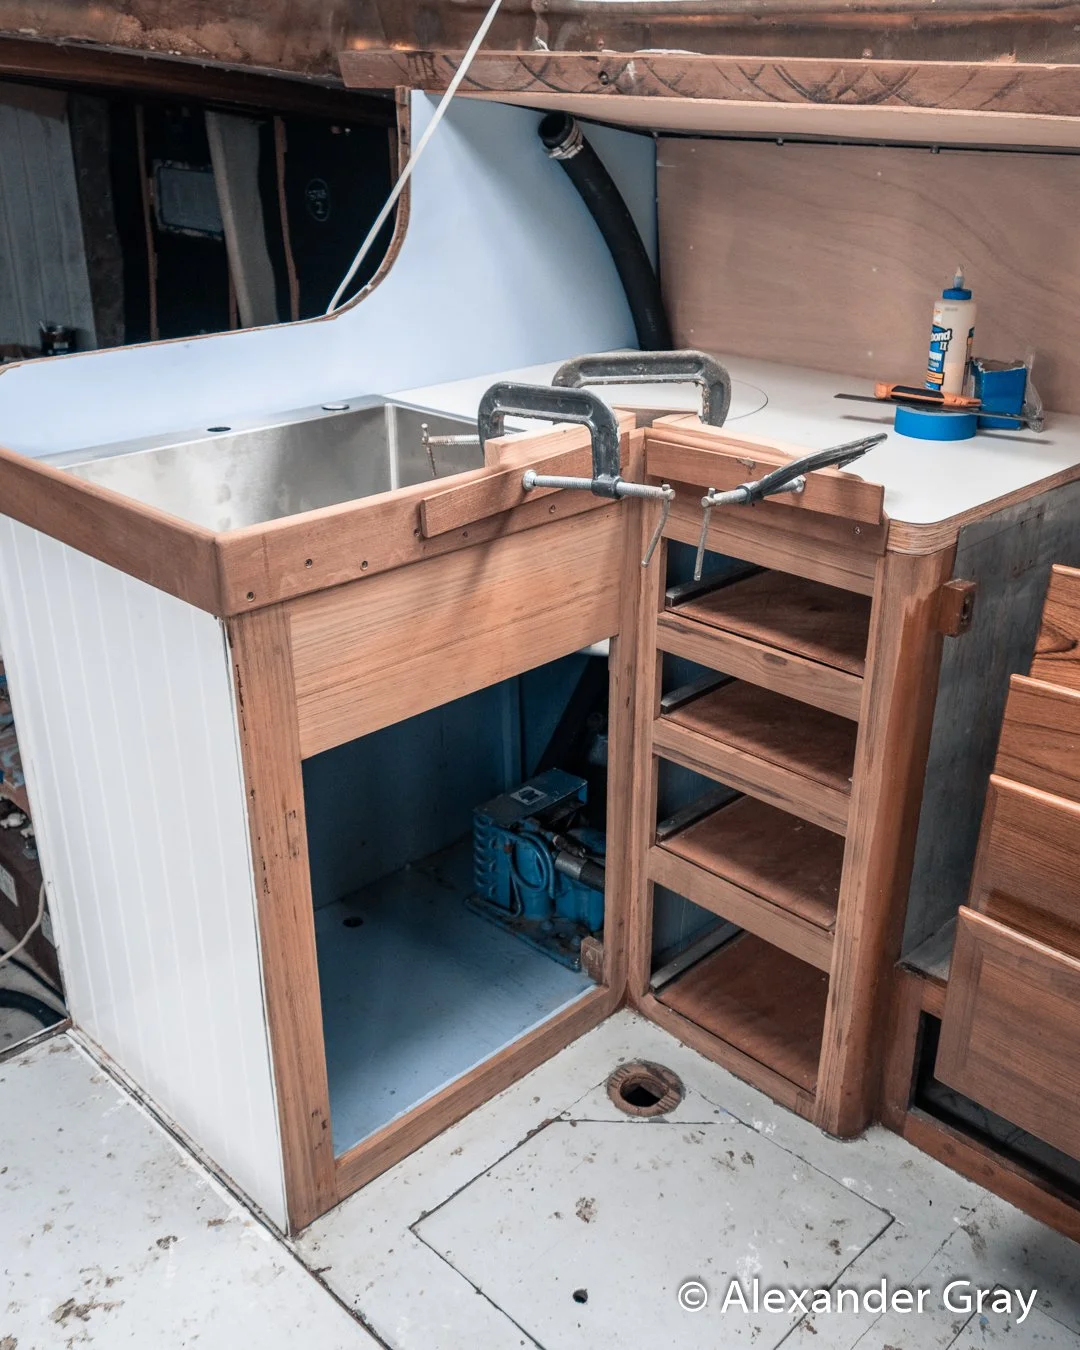
5. Framework - I decided to use dimensional lumber for the framework of much of the interior cabinetry. Douglas Fir (Oregon Pine) was readily available in the United States, strong, rot resistant and stable while being very easy to work with. Having a sliding compound mitre saw on the job site made the framing process fast and easy. Joinery of the framing was kept simple; employing pocket hole, mitre and rabbet joints. The most challenging aspect of building the framework was ensuring that horizontal surfaces were parallel to the waterline. With the yacht out of the water - spirit levels and plumbobs were not reliable reference points. Instead I relied on measurements taken from structural bulkheads and a builders square. This proved to be successful.
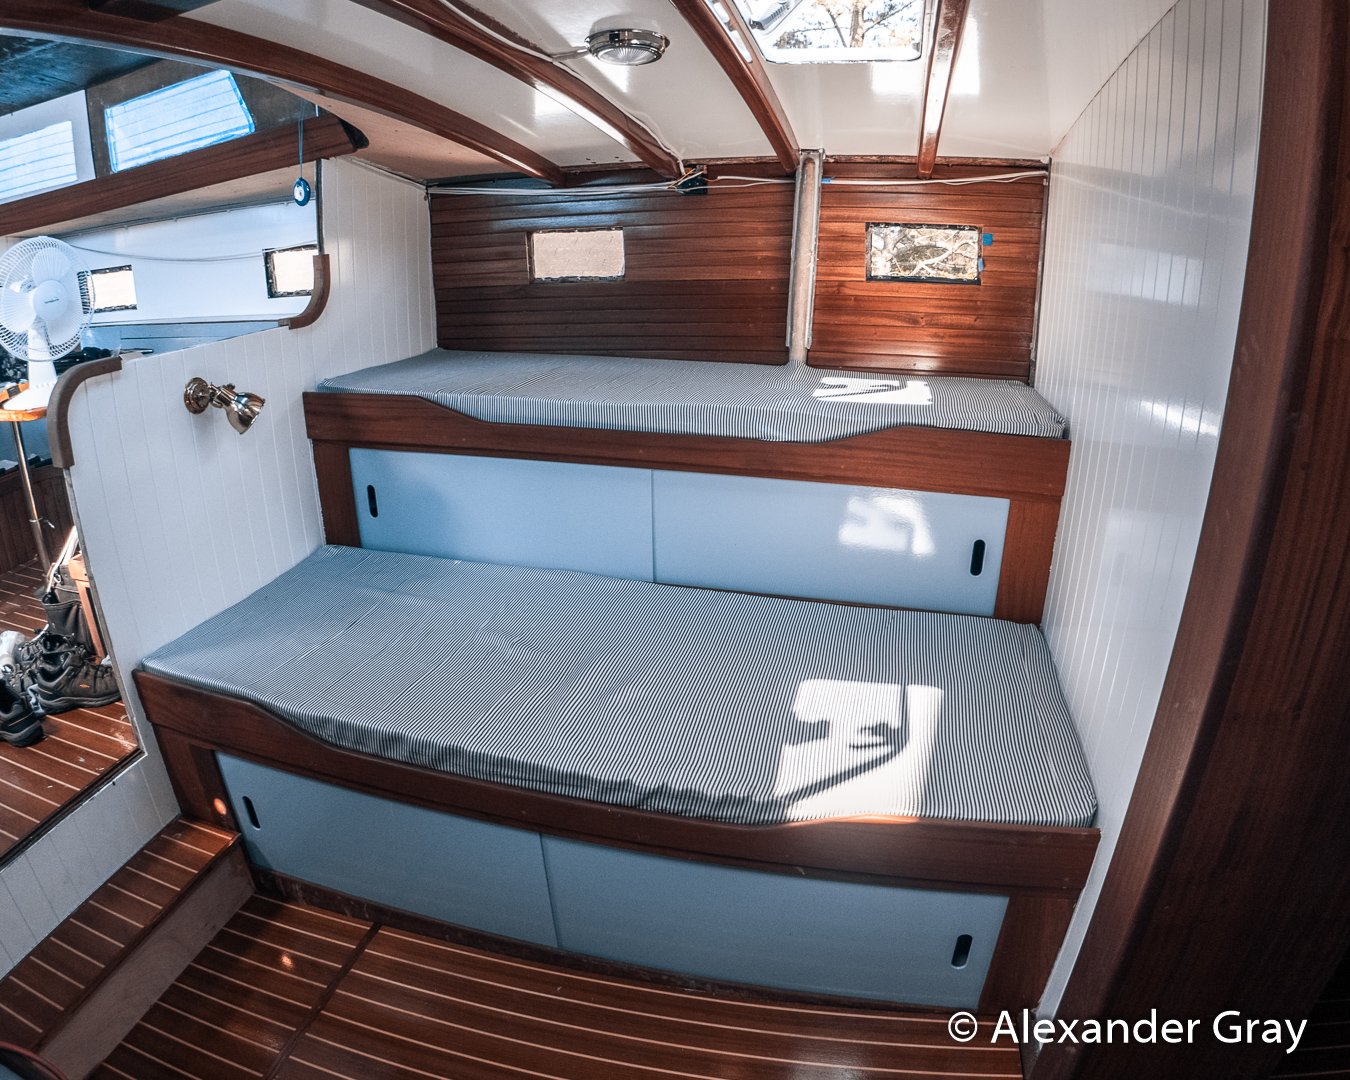
6. Cabinetry/Joinery - A significant goal of the restoration was to transform the look and feel of the interior from dark and dated to bright and modern. To achieve this, solid Mahogany was used in contrast to bright white and powder blue surfaces. To maintain a traditional aesthetic to the yacht's interior, I milled custom V-groove bead-board from 6mm, Meranti marine plywood that was then cut to size using templates and fastened to all visible bulkheads with stainless steel pin nails. Horizontal surfaces were finished with hard wearing, white laminate and capped with solid mahogany fiddles throughout. In keeping with tradition, I lined the hull sides in the v berth and bunk areas with a solid mahogany, tongue and groove ‘ceiling’. Radius corners of bench tops and bulkheads were capped with sawn or laminated curved mahogany trim to ensure there were no hazardous corners. Multiple coats of Tung oil were applied to mahogany fiddles as an easy to maintain finish, while cabinet door frames were meticulously rolled and tipped with high gloss spar varnish.
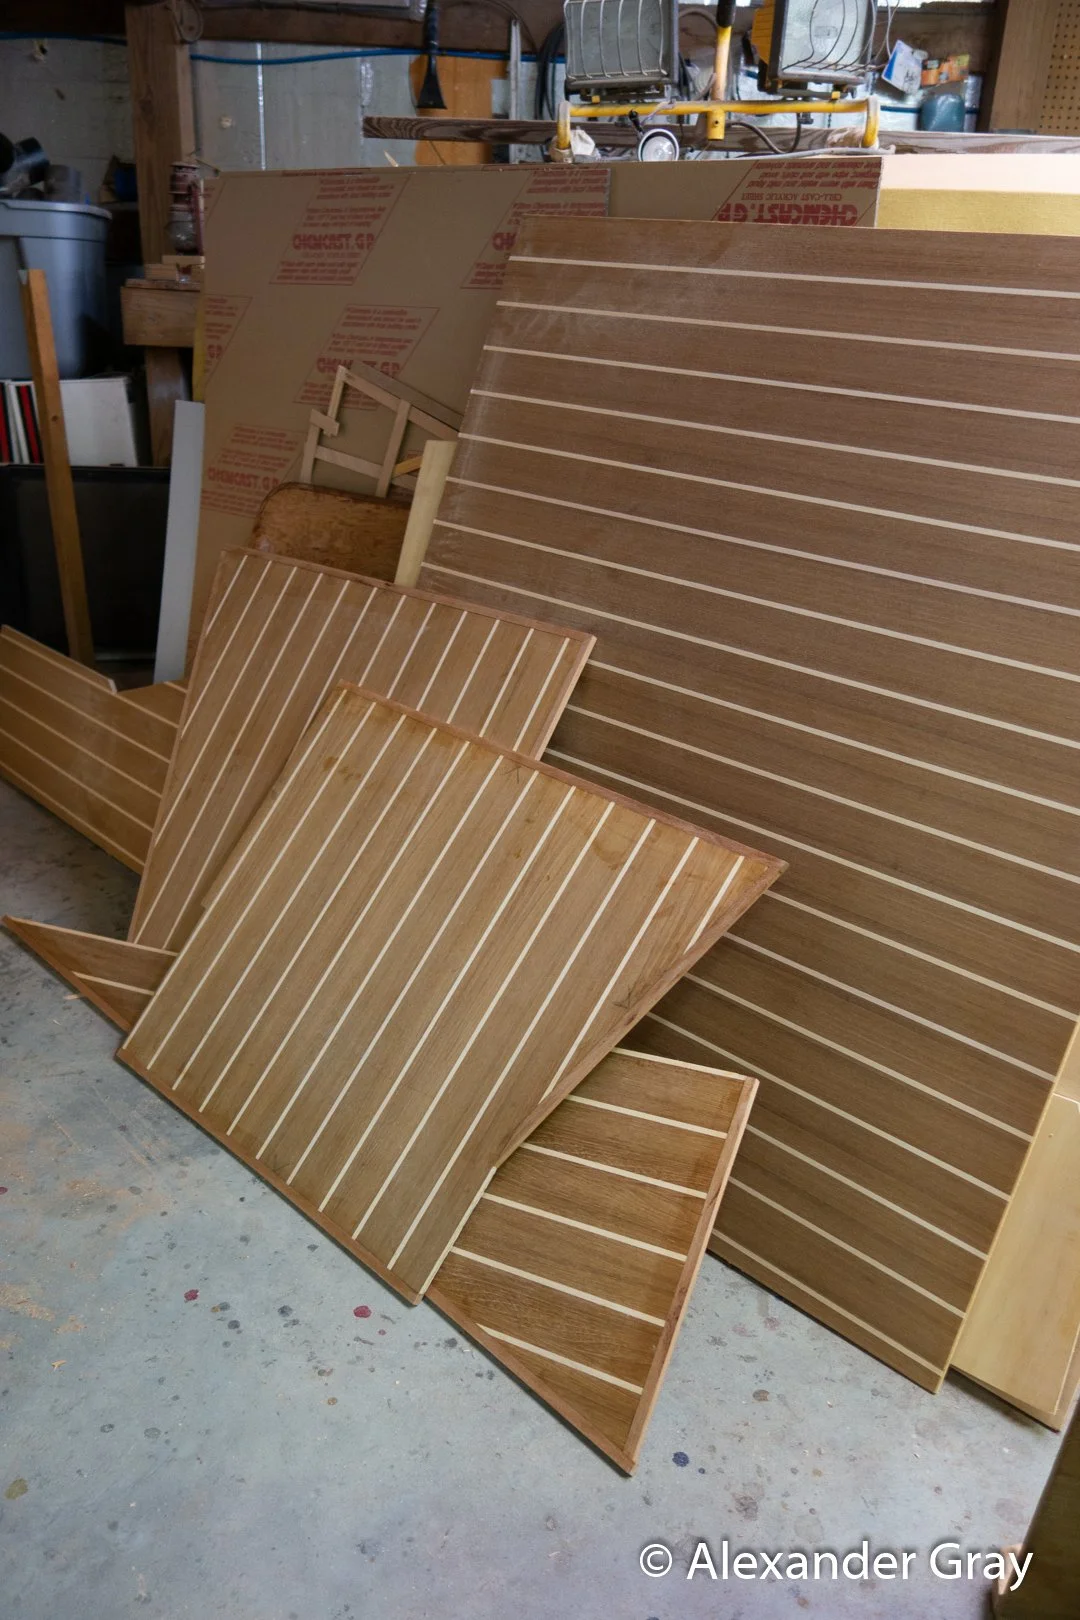
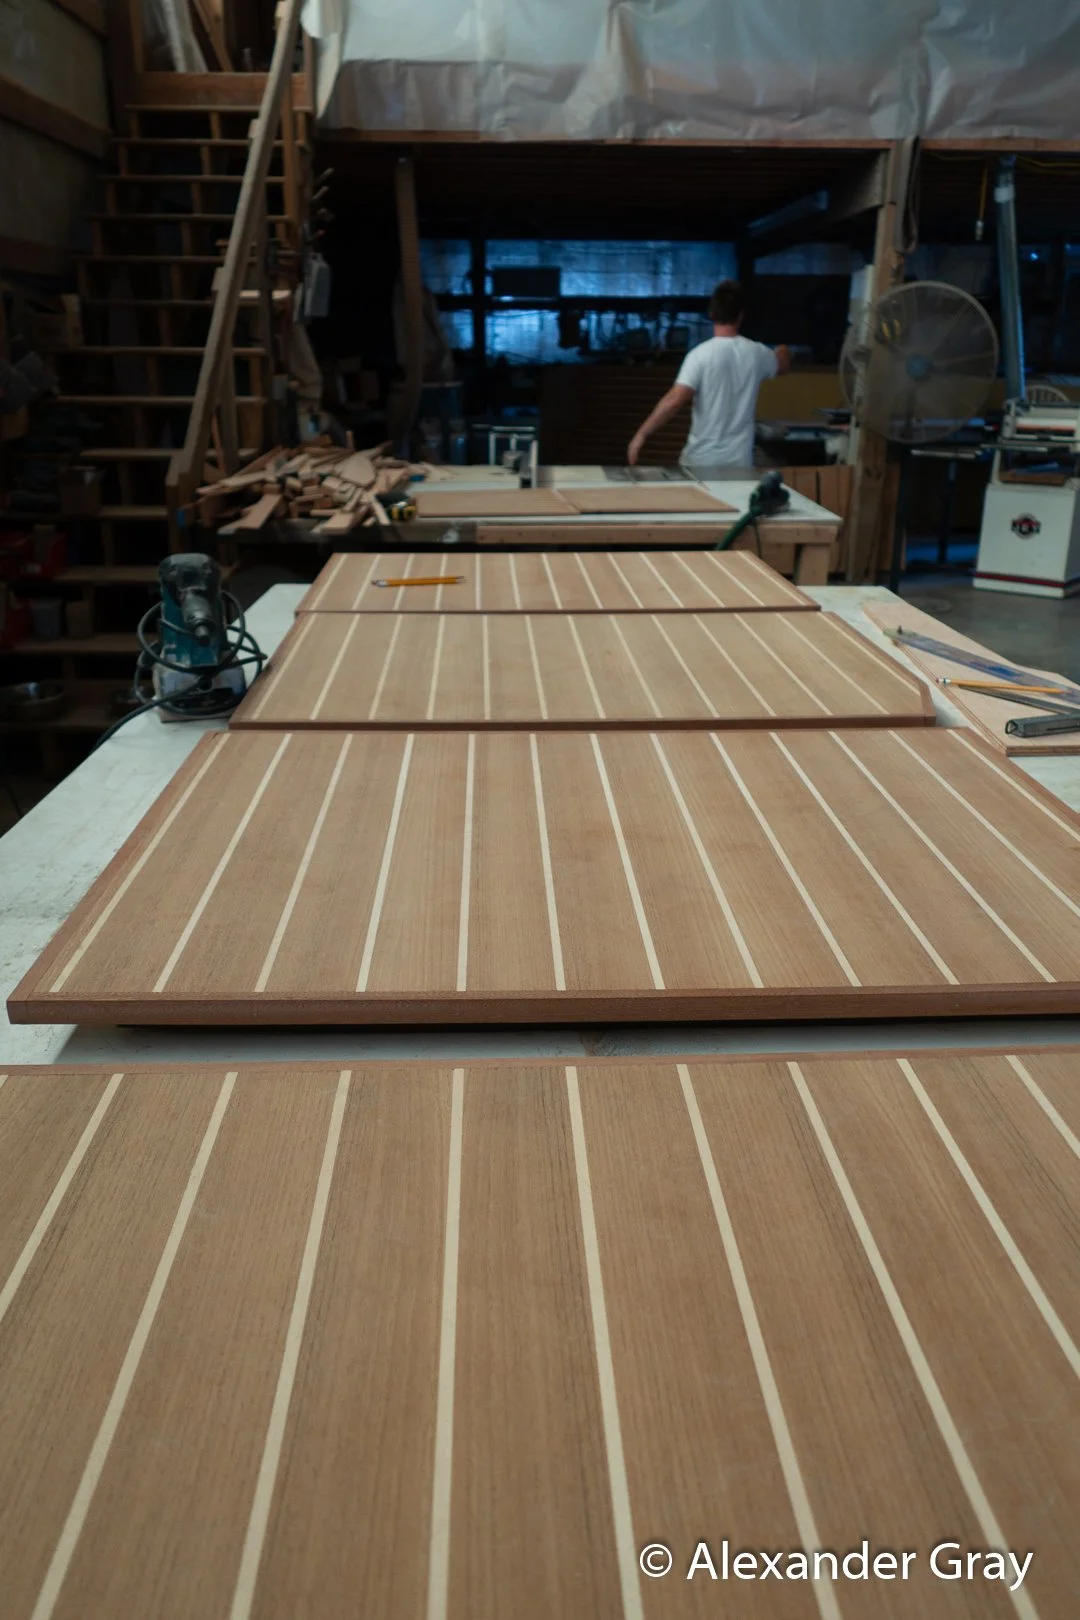
7. Cabin Sole - The original cabin sole was built from high quality Douglas Fir marine plywood and remained in sound condition, despite looking very rough around the edges. I decided on using 9mm Teak and Holly plywood to refresh the look of the cabin, contributing to the classic aesthetic of the boat while remaining easy to clean. Using templates assembled from plywood battens and hot glue, I made patterns to transcribe onto the teak and holly plywood sheets. I cut the new sole pieces to size using a circular saw and a jigsaw to measurements allowing for a solid mahogany band to be edge glued around each piece. Every cross grain cut was first scored with a razor blade to avoid grain tear out. The mahogany edge banding was joined using biscuit joints and titebond II wood glue, held in place with stainless pin nails while curing. After dry fitting and making sure everything fit perfectly, all pieces were removed for sanding and finishing.
Layout of Trim’s new interior / Agata Kaczkowska, 2020